
Table of Contents
The Comfort of Old Fashioned Yeast Rolls
Ever had one of those days where you’re just in the mood for a warm, buttery
roll and a good memory to go with it? that’s sunday dinners at my
grandma’s house.
Magic always filled the kitchen – freshly baked old fashioned yeast
rolls were the main attraction.
really, you can’t pull apart soft buttery rolls that are still warm
One of the best things about these fluffy rolls is they practically beg to be slathered with butter as they melt in your mouth with a pillowy soft bite.
Let’s get into those yummy rolls a little more, the ones that make my heart (and stomach) so very happy.
Some History and a Boom in Popularity
Old fashioned yeast rolls have a historical, homely aesthetic that goes back to traditional bread-baking homemaking.
Coming from basic traditional yeast rolls recipes, these gems were shared among generations turning family meetings into memories that last a lifetime. fast forward to today, these rolls have secured their spot on tables from coast to coast, especially during the holidays or family get-togethers.
Let’s talk practicality! this recipe is kind of fancy but totally doable. you’ll need about 1 hour and *20 minutes — 15 * minutes of hands-on time, an hour to let those rolls rise (total zen time, i promise), and about 15- 20 * minutes * of baking.
It’s medium difficulty—sure, you’ll be working with active dry yeast and kneading dough, but trust me, you’ll feel like a rock star once you nail it.
And cost-wise? you can whip up a dozen glorious rolls without breaking the bank!
Why You’ll Love These Rolls
Now, why should you make these fluffy delights? for starters, they’re packed with health benefits . okay, maybe not in the way kale is, but let’s be real—anything homemade tends to be better than store-bought.
Plus, these rolls are super satisfying. think of them as the cozy southern comfort food we all love, wrapping you in a warm hug after a long day.
What’s even better? they’re perfect for any event! be it thanksgiving dinner or just a tuesday night with family, these rolls fit right in.
Their fluffy, buttery texture gives them an edge over other bread recipes, making them an instant favorite. whether you’re serving them with buttered rolls or using them to mop up gravy, you’ll want to have these around all the time.
The Perfect Moment to Make Them
Feeling inspired? here’s the best part: these rolls aren’t just for special occasions. craving some fresh homemade bread recipes ? grab your apron.
They’re excellent for cozy weekends or whenever you feel like indulging in a bit of comforting goodness. plus, with yeast roll variations like adding cheese or herbs, you can mix things up if you’re feeling adventurous!
So, are you ready to roll? let’s gather the ingredients because you’re about to make the best dinner rolls recipe that will win over hearts and taste buds during every meal.
Here’s a sneak peek at what you’ll need…
(And trust me, you’ll want to keep reading to learn all those dough rising tips and get into the detailed instructions!)
Essential Ingredients Guide: Making Magic with Old Fashioned Yeast Rolls
Let’s dive into the heart of baking – the ingredients. This section is your trusty sidekick in the kitchen, especially if you’re pulling together classic old fashioned yeast rolls .
Premium Core Components
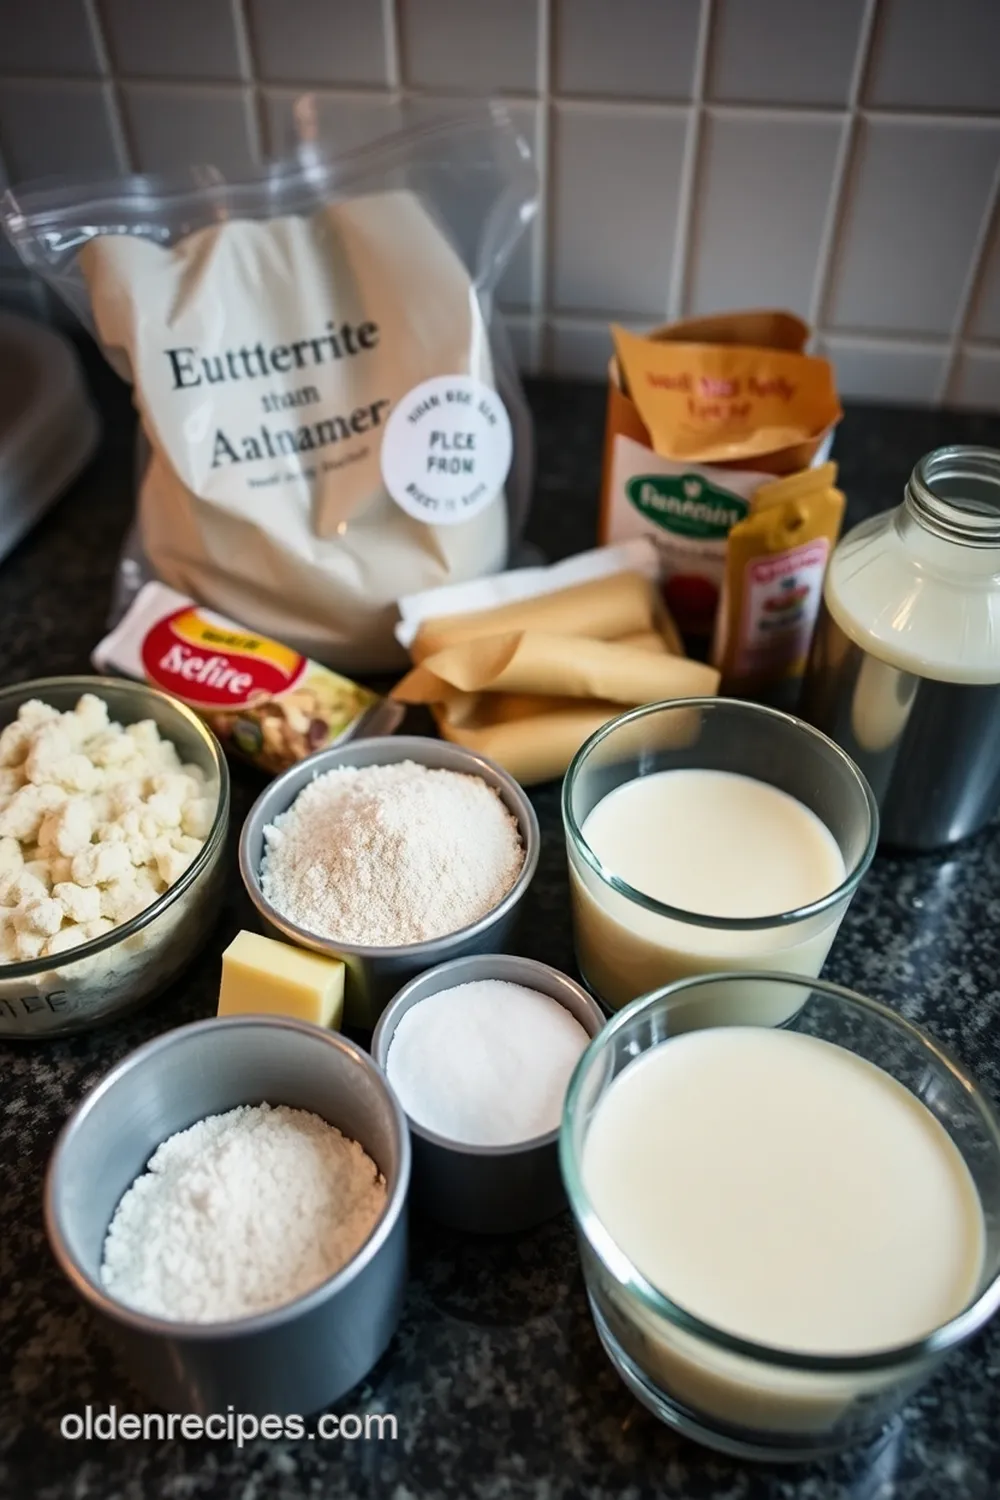
First things first, let’s get the measurements down . Here’s what you’ll need:
- 4 cups (480g) all-purpose flour
- 2 1/4 teaspoons (1 packet) active dry yeast
- 1/4 cup (50g) granulated sugar
- 1 teaspoon salt
- 1/2 cup (120ml) whole milk (warm, about 110° F/ 43° C)
- 1/4 cup (56g) unsalted butter (melted)
- 2 large eggs
When buying your ingredients, go for quality . fresh yeast is crucial for those fluffy dinner rolls. look for ingredients with clear expiration dates.
If your yeast is more than a few months old, you might end up with flat rolls.
Storage tips? keep your flour in a cool, dry place, and treat your active yeast like royalty – keep it in a sealed container in the fridge.
Most ingredients will last for months, but for the freshest bread experience, don’t wait forever to use them!
Freshness is everything. When selecting flour, give it a whirl in your hands; it should be fine and light. If it feels clumpy, it’s probably time to toss it.
Signature Seasoning Blend
Let’s not forget the magic of seasonings . while your basic rolls are fabulous, you can elevate them with some herbs and spices .
Think garlic powder or even a pinch of italian seasoning for that extra pop. some folks love adding cheese to the mix for a twist.
For a southern comfort food feel, consider rosemary or thyme. You can create yeast roll variations that are as diverse as your palate!
Smart Substitutions
Sometimes, you might need a quick fix. let’s say you’re out of milk; no sweat! almond milk or oat milk both do the trick.
Got no unsalted butter? grab that olive oil instead. just be mindful of the flavors it brings to the table.
If you’re looking for easy yeast-based rolls , there are always options. Seasonal ingredients can work wonders. In fall, try incorporating a touch of pumpkin puree for a harvest vibe.
Kitchen Equipment Essentials
Before whipping up those soft buttery rolls , let’s talk tools. These essentials include:
- A large mixing bowl
- Measuring cups and spoons
- Whisk (or just a really strong fork)
- Wooden spoon/spatula
- Plastic wrap or a kitchen towel to cover your dough
- Baking sheet (Don’t forget parchment paper!)
If you’re someone who loves to mix things up in the kitchen, a stand mixer can save time and effort when kneading those rolls.
Final Thoughts and Transition
But here’s the real scoop: baking is both an art and a science. knowing how to make your rolls fluffy and light is essential.
If you remember to activate your yeast properly and give the dough a warm place to rise, you’re halfway there!
So grab those ingredients, roll up your sleeves, and let’s get to the instructions for making those classic old fashioned yeast rolls you’ve been dreaming about.
Trust me; your family will thank you for these soft, buttery delights at dinner!
The Magic Behind Classic Old Fashioned Yeast Rolls
Oh my gosh! if you’re looking to elevate your dinner to a whole new level, let me introduce you to my go-to recipe for classic old fashioned yeast rolls .
These rolls are soft, buttery, and downright delightful—perfect for holiday gatherings or just a cozy weeknight meal.
Essential Preparation Steps
Mise en Place Details
First off, let’s talk about mise en place . this fancy french term just means getting your stuff in order before you start cooking.
Gather your ingredients—flour, yeast, sugar, milk, butter, and eggs—so you don’t scramble (pun intended!) looking for things in the middle of mixing.
Time Management Tips
Next up, timing is everything. Set aside about 1 hour and *20 minutes * total for prep and cooking. This sounds like a chunk of time, but trust me, it flies by when you smell those rolls baking!
Organization Strategies
Keep your space clean and organized. it makes the process smoother. also, consider labeling your ingredients if you’re easily distracted.
I swear, you’ll think you put sugar in, only to find out you used salt!
Safety Considerations
Safety is key, friends! Be careful with your oven—****375° F is the magic number you’ll want to preheat to. And if you’re using sharp objects, well, you know the drill—keep those fingers safe!
Step-by-Step Process
- Activate the yeast : start by mixing 1/2 cup of warm milk (aim for about ****110° f ) with 1/4 cup of sugar and sprinkle in 2 1/4 teaspoons of active dry yeast . Let it sit for about *5 minutes * until it’s frothy. this is where the magic begins!
- Mix Dry Ingredients : In a large bowl, whisk together 4 cups of flour and 1 teaspoon of salt .
- Combine Ingredients : Make a well in the flour, then add your melted butter and two big ol’ eggs, followed by that frothy yeast mixture.
- Knead the dough : this part is crucial. knead for 7- 10 * minutes * until it’s smooth and elastic. You want that dough to spring back when poked—it’s all about that gluten!
- First rise : place the dough in a greased bowl, cover it, and set it in a warm spot for about 1 hour until it’s doubled in size. Here’s a good tip: a slightly warm oven works wonders!
- Shape Rolls : After it’s risen, punch that dough down—love this part! Then divide it into 12 pieces and shape them into rolls.
- Second Rise : Place these rolls on a baking sheet, cover, and let them puff up for another 30- 45 * minutes *.
- Preheat Oven : At this point, crank your oven to ****375° F .
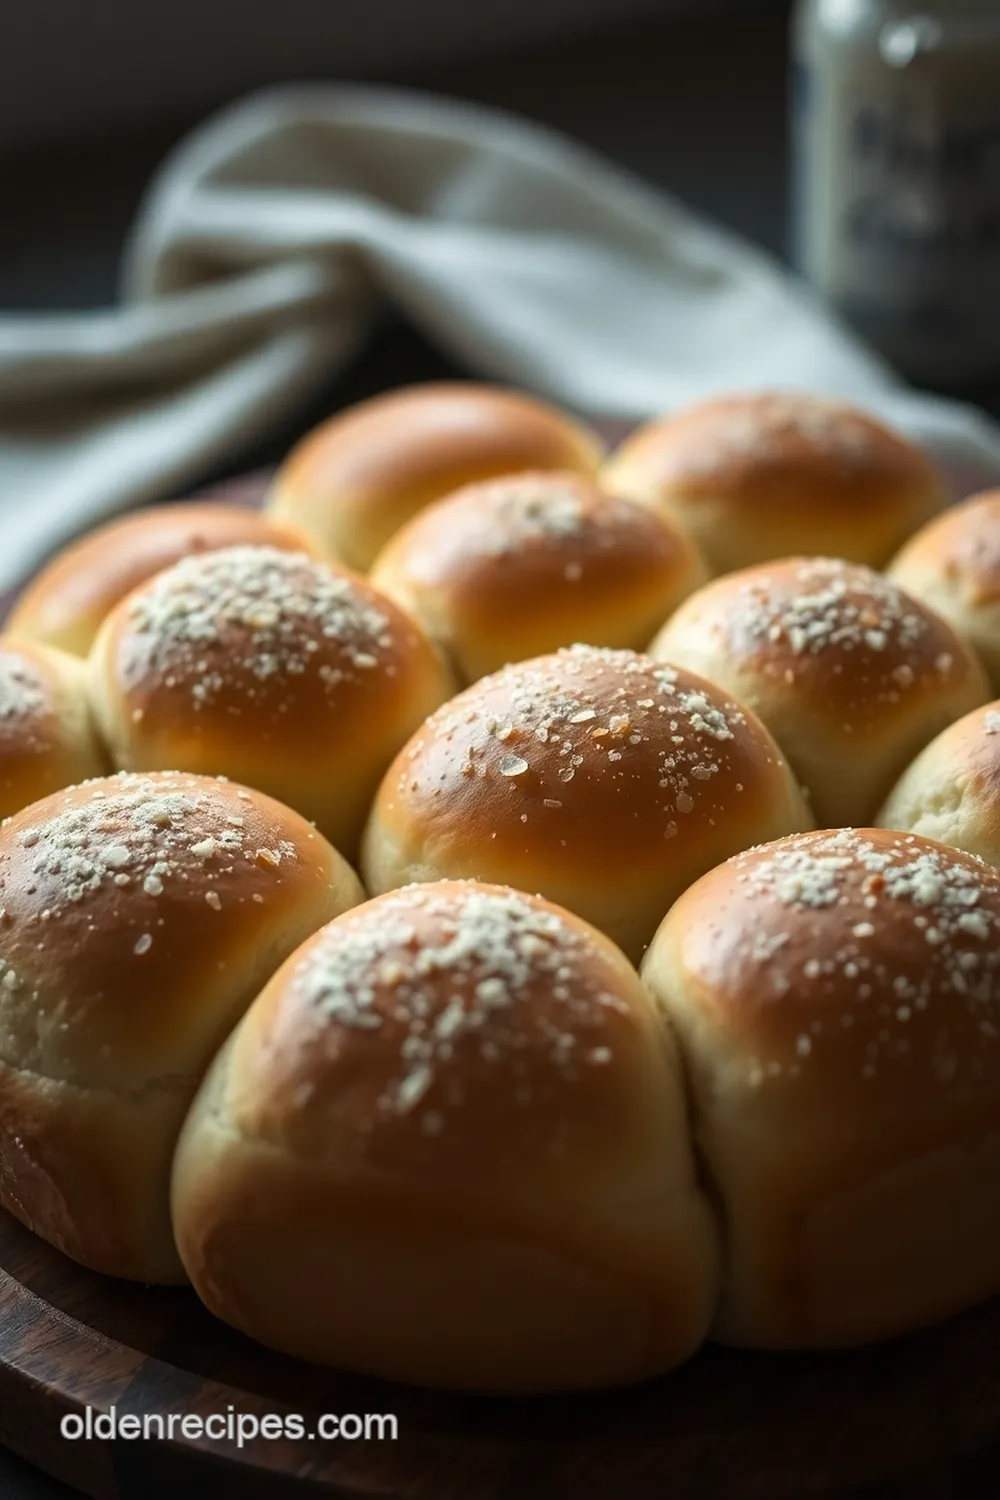
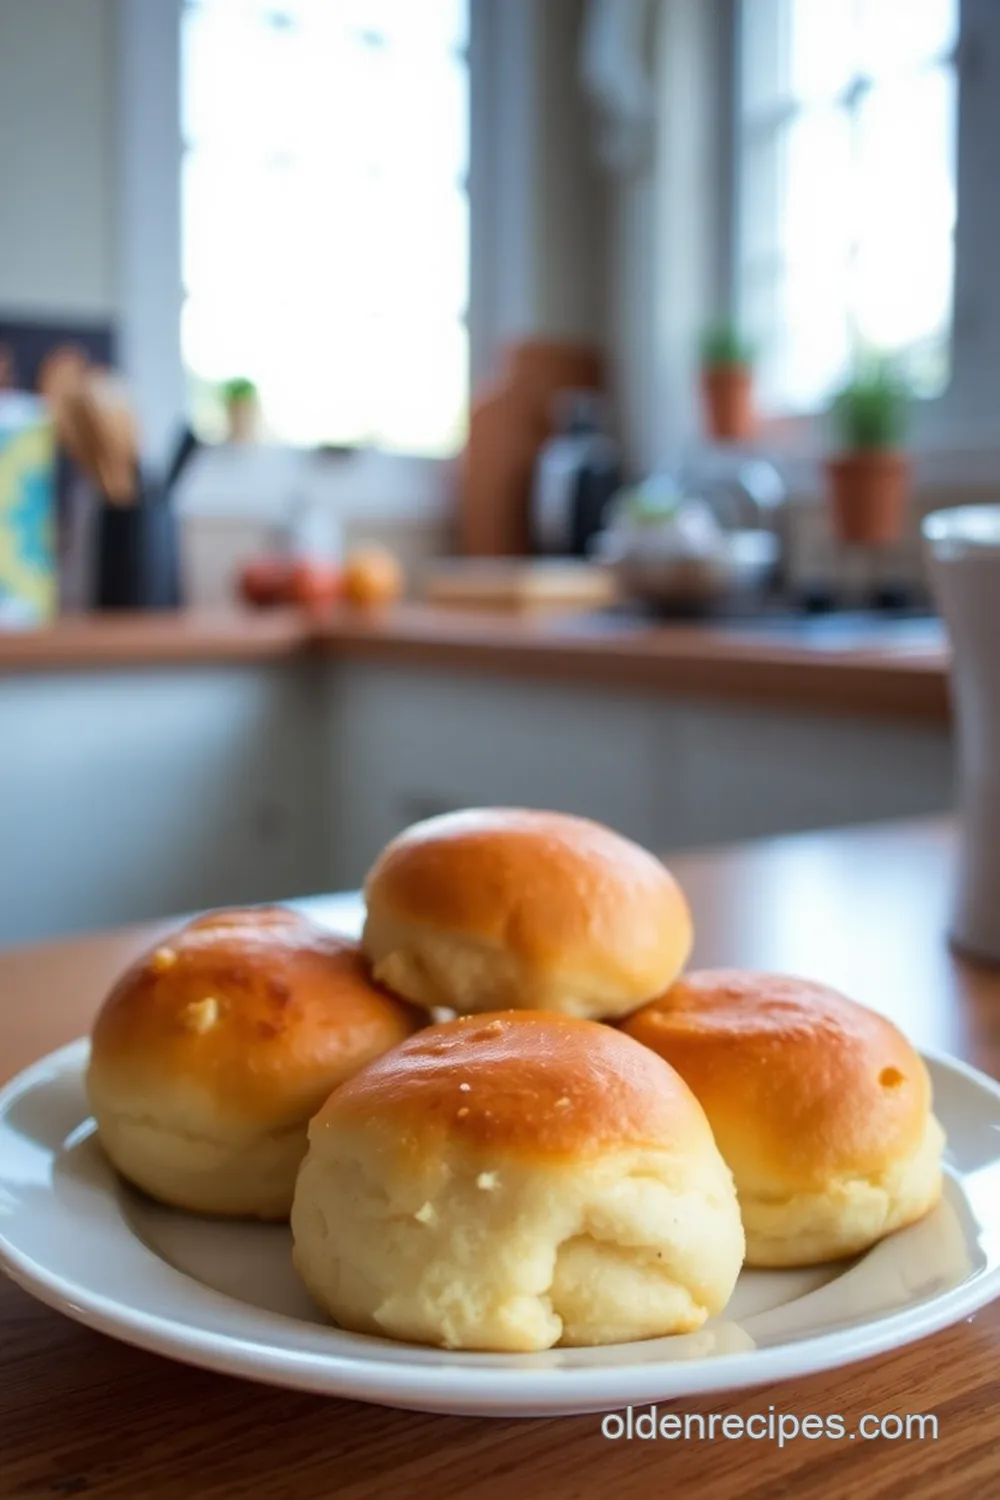
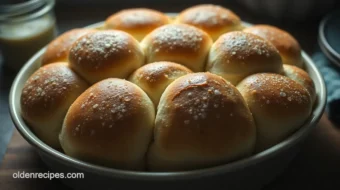
- Bake the Rolls : Brush each roll with melted butter and bake for 15- 20 * minutes * until they’re golden-brown and calling your name.
- Cool and Serve : Let them cool slightly before you dig in. Trust me, you’re going to want to savor that first bite!
Expert Techniques
So, what’s the key to getting these fluffy dinner rolls just right?
- Start with fresh yeast. Always check the expiration date!
- Don’t skimp on the kneading. It’s what gives your rolls their soft and airy texture.
- When baking, keep an eye on that color—golden-brown is what you’re aiming for.
Success Strategies
Listen up—here are some common mistakes to avoid.
- For folks rushing, let that dough rise fully! If you don’t wait the full 1 hour and 30- 45 * minutes *, your rolls won’t fluff up nicely.
- Always check the temperature of your ingredients. Cold milk won’t activate that yeast like warm milk will.
Now that you’re armed with the best tips, you can totally nail this homemade bread recipe ! and hey, if you’re looking to prep these ahead of time, you can freeze the rolls before the second rise.
Just thaw overnight in the fridge and let them rise before you bake!
These rolls are the ultimate southern comfort food—trust me, once you’ve tried this best dinner rolls recipe , you’ll want to share it with everyone.
It’s the kind of recipe that’ll bring everyone together, just like those classic holiday recipes we remember from our childhood.
In the next section, I’ll dive into some additional information that will help you explore more about the wonderful world of yeast rolls and other recipes to try! Let’s keep those rolls rollin’!
Pro Tips & Secrets: Mastering Old Fashioned Yeast Rolls
Alright, folks, let’s dive into the heart of baking the best dinner rolls recipe around – yes, i’m talking about those old fashioned yeast rolls that have a soft, buttery goodness and a nostalgia factor that’ll make you feel right at home.
You know, the kind that your grandma probably made, with love and a sprinkle of magic.
Chef’s Personal Insights
First off, don’t rush the process. yeast loves to take its time. when you’re activating that active dry yeast, let it sit until it’s all frothy – it’s like watching a little yeast party! if it doesn’t foam, it’s time to toss it and start fresh.
Another thing? don’t skip the kneading! it’s like a workout for your dough and helps those rolls get that perfect roll texture.
If you’re feeling fancy, try kneading while listening to some old-school tunes. trust me, it adds charm!
Time-Saving Techniques
Here’s a little hack: if you want to make quick yeast rolls, prepare the dough the night before. just keep it covered in the fridge.
Let it rise in the morning for a fresh batch of fluffy dinner rolls ready before noon.
Flavor Enhancement Tips
Want to up your game? add a sprinkle of garlic powder or swap some milk for buttermilk. boom! flavor explosion.
Or, try herb and cheese rolls by tossing in some shredded cheese and your fave herbs. it’s like you took a little trip to the bakery without leaving your kitchen.
Perfect Presentation: Making It Pop
Presentation is key, my friends! these rolls deserve a spotlight. when it’s time to plate, try using a beautiful basket lined with a lemony kitchen cloth.
It’ll be like a cozy bakery right on your table!
Garnish Ideas
Add a simple garnish with fresh herbs. A sprig of rosemary or thyme on top makes those homemade bread recipes really stand out – like those fancy restaurants without the hefty price tag!
Color Combinations
Remember, eat with your eyes first! A touch of melted butter brushed on top gives that rich golden hue, making your fluffy rolls look irresistible.
Visual Appeal Tips
Arrange them in a spiral or in a cozy cluster; it’s all about that vibe. A little contrast with roasted vegetables next to them can brighten up the plate, too!
Storage & Make-Ahead: Keep It Fresh
Now, let’s talk about keeping those rolls fresh. once they’re baked, let them cool completely on a wire rack. then, store them in an airtight container or a resealable bag.
They’ll last about 3 days at room temperature; just make sure they’re protected from a dry atmosphere.
Preservation Methods
If you want to keep them longer, toss those rolls in the freezer. they can hang out in there for up to 3 months.
Just make sure to wrap them well; nobody wants freezer burn on their delicious rolls!
Freshness Duration
When you’re ready to enjoy them again, just pop them in the oven at 350° f for about 10- 15 minutes.
Fresh out of the oven, they’ll taste like they were just made. yum!
Creative Variations: Get Adventurous
Let’s get creative! You can switch the vibe of those old-fashioned rolls quite easily.
Flavor Adaptations
Try adding cinnamon for a sweet twist – yes, fluffy cinnamon rolls in the making! you can even make a pull-apart version when you layer them with butter, sugar, and cinnamon.
It’s a game-changer!
Dietary Modifications
Got a dietary need? No worries! For gluten-free lovers, there are great flours out there that can help make easy yeast-based rolls. Play around with ingredient ratios to discover your new favorite.
Seasonal Twists
When holidays roll around, get festive with cranberry and orange zest in your rolls. or, a pumpkin spice version for that autumn vibe.
Seasonal flavors can turn your rolls into holiday bread recipes everyone will remember.
Regional Variations
Feeling adventurous? infuse a bit of your cultural palate – say, a jalapeño and cheddar combo for a southern kick.
It’s like a home-cooked hug, and versatile bread recipes like these never fail to impress.
Complete Nutrition Guide: Keeping it Real
Now, for those who keep an eye on health, here’s a quick breakdown. each old fashioned yeast roll is about 170 calories, which isn’t too shabby when you think of the comfort they bring.
Health Benefits
They offer carbs to keep you energized, and let’s be honest, sometimes a warm roll is exactly what the heart needs.
And hey, throw in some whole wheat flour for extra fiber, turning those rolls into a more wholesome treat.
Portion Guidance
Remember, moderation is key! Treat them like a delicious side, rather than the main course. They’re perfect with dinner roll sides such as roasted veggies or a hearty soup.
Expert FAQ Solutions: Your Questions Answered
Got burning questions? Let’s tackle a few common ones:
Why aren’t my rolls rising? It could be your yeast – check that expiration date!
Can I use whole wheat flour? Absolutely! Just remember to maybe adjust the liquid a bit since wheat flour absorbs more.
What if my dough is too sticky? No worries, add a little bit of flour to help it out.
So there you have it! the secrets of crafting those old fashioned yeast rolls that will please the whole family.
Grab your apron and don’t hesitate – dive into this beautiful journey of baking today. your future self, along with your family and friends, will thank you! remember, cooking is about love, warmth, and memories.
Happy baking!
Kansas State University Extension (Yeast Baking Guide)
https://www.ksre.k-state.edu/news/stories/2021/12/freezing-doughs.html
Fluffy Old-Fashioned Yeast Rolls for Every Occasion
Ingredients
- 4 cups 480g all-purpose flour
- 1 packet 2 1/4 tsp or 7g active dry yeast
- 1/4 cup 50g granulated sugar
- 1 teaspoon salt
- 1 cup 240ml whole milk, warmed to 110°F (43°C)
- 1/4 cup 60g unsalted butter, melted
- 2 large eggs at room temperature
- 2 tablespoons 30g unsalted butter, melted (for brushing before baking)
Instructions
- In a bowl, combine warm milk and sugar.
- Sprinkle yeast over the top and let sit for 5-10 minutes until frothy.
- In a large mixing bowl, whisk together flour and salt.
- Add activated yeast mixture, melted butter, and eggs to the dry ingredients.
- Mix until a sticky dough forms.
- Transfer dough to a floured surface and knead for 8-10 minutes until smooth and elastic.
- Place dough in a greased bowl, cover with a towel, and let rise in a warm place until doubled in size (about 1 hour).
- Punch down the dough, divide into 12 equal pieces, and shape into balls.
- Place shaped rolls on a prepared baking sheet, cover, and allow to rise until doubled (about 30-40 minutes).
- Preheat oven to 375°F (190°C).
- Brush rolls with melted butter and bake for 15-20 minutes until golden brown.
- Allow rolls to cool slightly before serving.
Hi, this is a comment.
To get started with moderating, editing, and deleting comments, please visit the Comments screen in the dashboard.
Commenter avatars come from Gravatar.