Table of Contents
A Pour of Flavor: My Journey to Making Walnut Milk
Oh my gosh, have you ever tried walnut milk?
I know, it sounds a bit out there, right?
but honestly, let me rewind to the first time I made it.
It was a lazy Sunday, and I was craving something creamy but didn’t want the usual dairy. Every time I tossed around the idea of a walnut milk recipe, I felt a little hesitant.
Would it be off-flavored?
Would it end up overly nutty?
Spoiler warning: I’m in love!
The moment I stepped into homemade nut milk, I knew that it was not only the taste but the vibe!
which I found suited the refreshing smoothies and evening smoothie bowl preparations I like to have.
And homemade nut milk, such as this walnut milk, is a wonderful way to enjoy non-dairy milk at home.
Let me take you through what makes walnut milk so special.
Bringing Walnut Milk Home: A Bit of History
Nut milks have been around for ages, dating back to various cultures that embraced plant-based diets. whether it was for religious practices or dietary restrictions, folks have been blending nuts with water long before we had fancy health stores.
Fast forward to now, and walnut milk is bursting in popularity! with the rise of vegan lifestyles and health-conscious choices, it’s no wonder everyone’s chatting about this creamy nut milk.
You might be wondering about the time it takes to whip up a batch. don’t stress! This is a super easy walnut milk recipe.
It takes around 45 minutes total, most of that time being the soaking part, which is pretty chill. the actual work? just 15 minutes.
Plus, you’ll end up with about 4 cups of that delicious, creamy goodness, ready for sipping!
Why You’ll Love Walnut Milk
Still on the fence? let’s chat about the perks. first off, the health benefits are impressive! walnut milk is packed with omega-3 fatty acids, which are awesome for your heart.
Plus, it’s a great vegan protein source and has a nice nutritional profile. just think about those nutrients without the lactose.
For people struggling with lactose intolerance, walnut milk is a total lifesaver.
Okay, imagine this: you’ve got friends coming over for brunch or maybe a cozy night in. Walnut milk is the perfect addition, whether you’re whipping it into walnut milk smoothies or pouring it over cereal.
It fits right in at special occasions like holiday meals or breakfast gatherings without the dairy drama.
A Quick Cost Check
And let’s not overlook the wallet. making homemade walnut milk costs less than buying it pre-made. those store-bought cartons can be pricey, but with just a cup of raw walnuts, you’re golden.
Plus, the yield makes it worthwhile—it’s like having your own milk factory. just think about it; you get to play around with sweetened walnut milk or even swap in some cocoa for a chocolatey delight.
Onwards to the Ingredients!
Now that I’ve hopefully whet your appetite for this creamy delight, let’s dive into the good stuff: the ingredients you’ll need to get started.
Remember, soaking the walnuts is key!
Trust me, soaking the nuts really is the difference.
Trust me, soaking nuts for milk really makes all the difference in that smooth consistency we’re after.
You don’t want to miss out on that velvety, rich experience, do you? You wouldn’t want to miss a chance for that velvety, rich experience, would you?
So stay posted as we move in to the ingredients section and you can have the pleasure of making your walnut milk at home.
Stay tuned as we move to the ingredients section and get ready to embrace the joy of making your own walnut milk. You will never stop thinking about milk.
You’ll never look at milk the same way again!
Your Go-To Guide for Making Creamy Walnut Milk
How to Make Luxurious Walnut Milk at Home in The Perfect 8-Step by Step Gos-To-Guide: Ingredients for Fresh Walnut Milk
Let’s be honest for a minute here:
Everyone loves a nice glass of homemade nut milk, right? really, it is simply so refreshing from attraction to doing it by yourself.
That’s what we’re all about today as we explore making rich and creamy walnut milk—a delicious dairy-free game-changer for your smoothies, coffee, or just enjoying a refreshing glass to drink
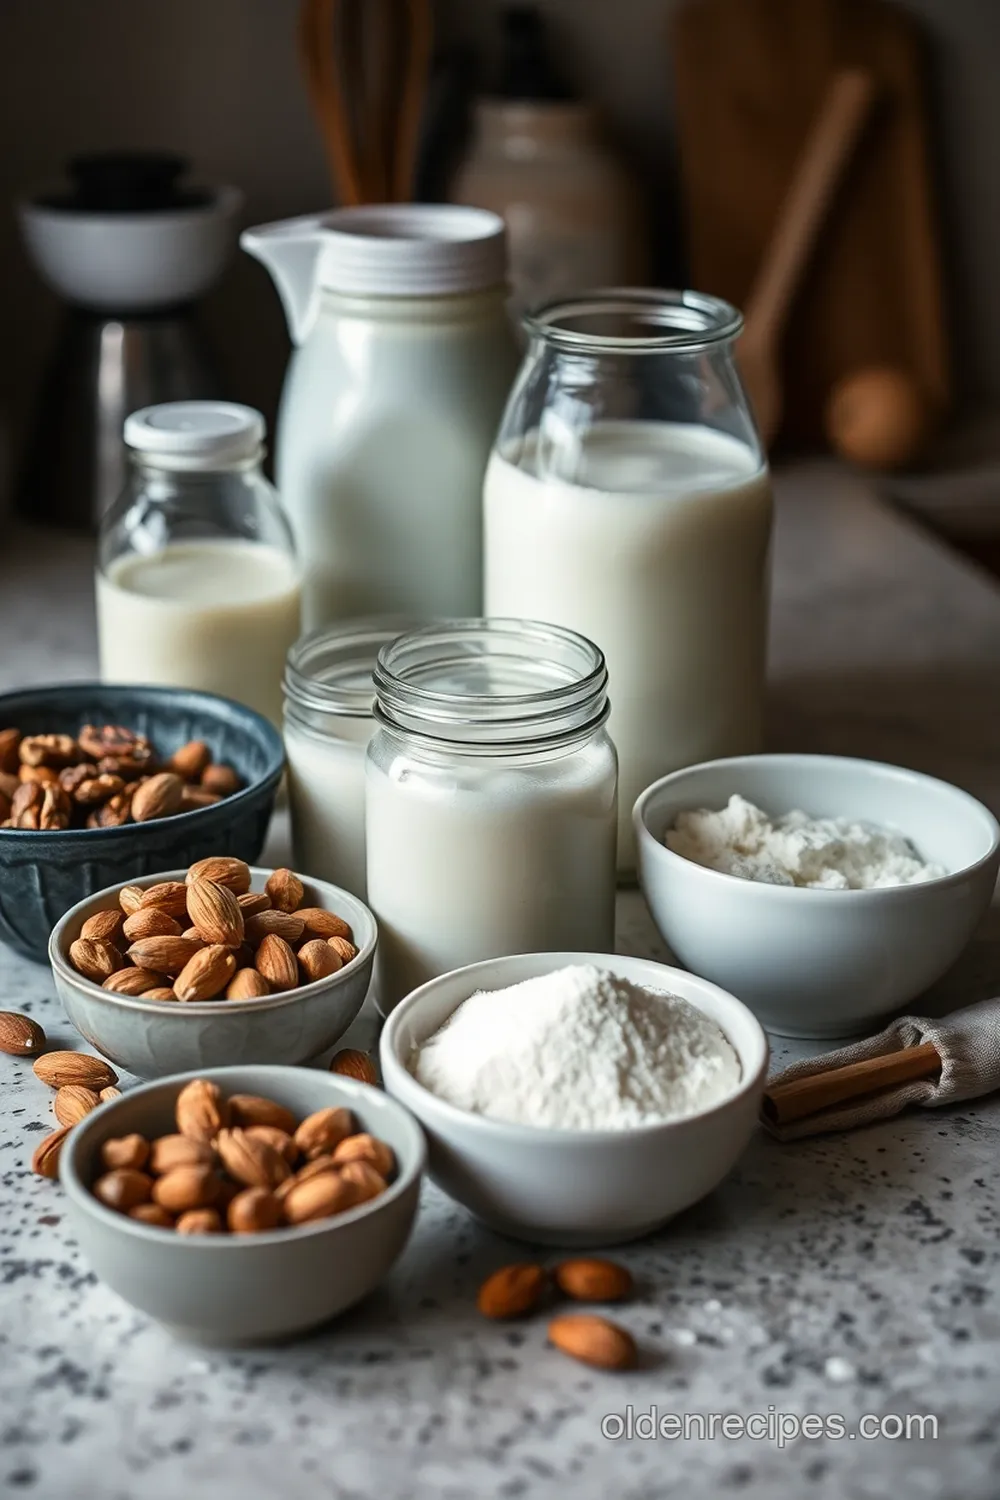
Premium Core Components
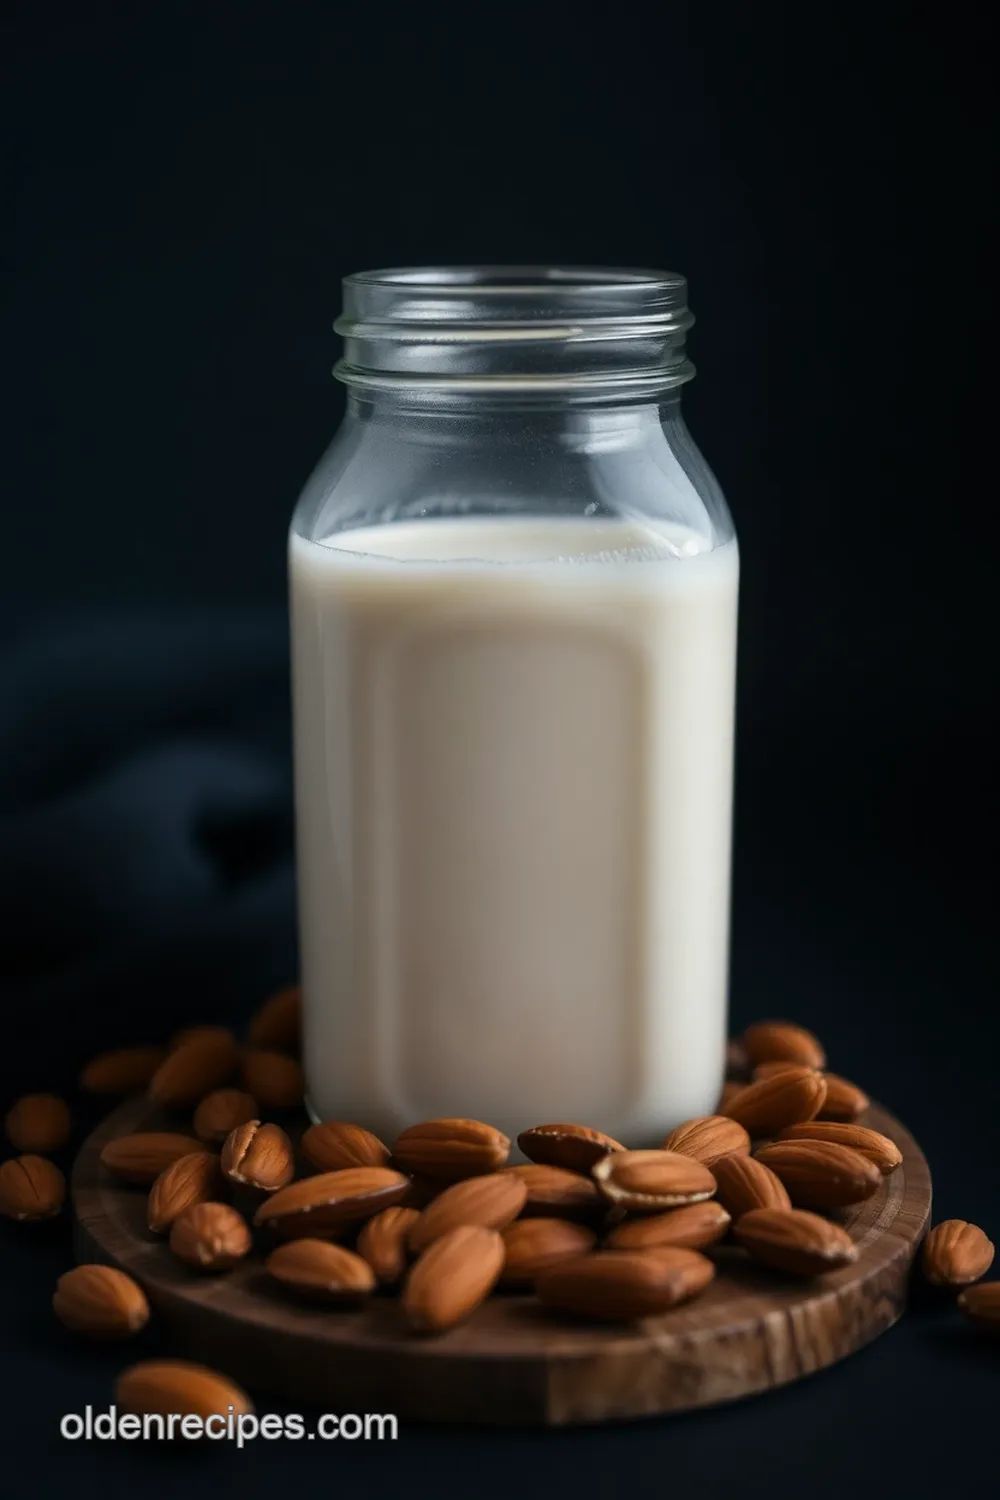
First off, let’s talk about quality ingredients you’ll need. for walnut milk, you want raw walnuts —about 1 cup (120g) will do the trick.
Don’t skimp on soaking those nuts for at least 30 minutes! it helps to soften them up, making blending a breeze.
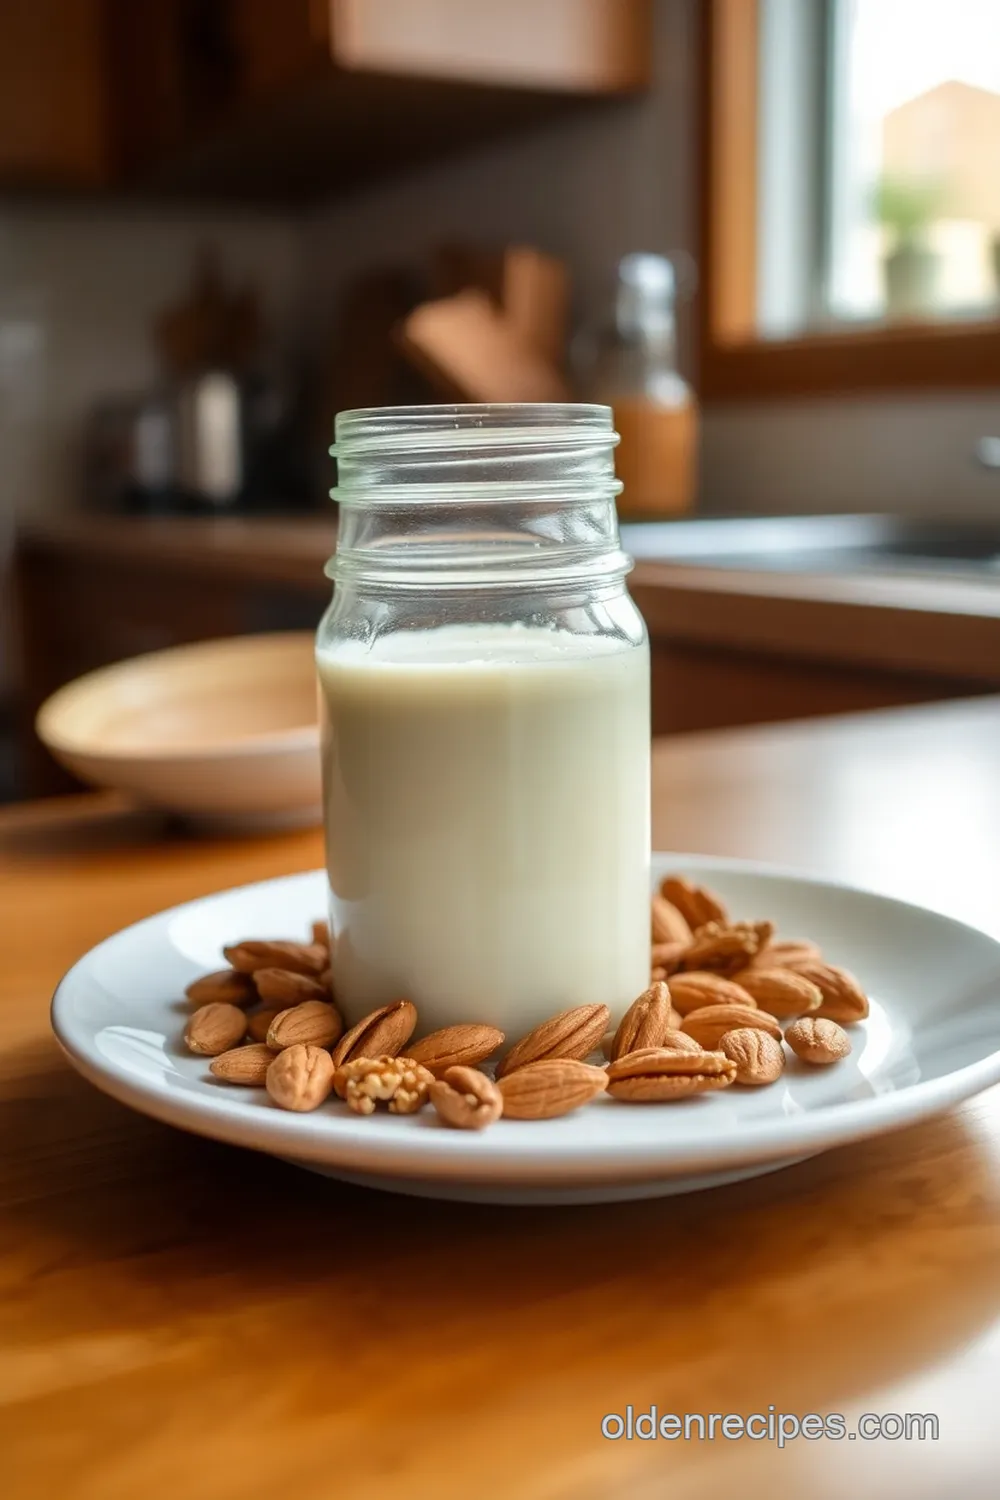
When it comes to storage, this milk is best kept in an airtight container in your fridge. it’ll usually last about 4-5 days —if it lasts that long, that is! trust me; you’ll find plenty of ways to use it.
A tip? Store it in glass bottles to keep it fresh and fancy. not to mention, you can impress your friends—“oh, this silky milk? just made it!”
Quality Indicators
Always go for walnuts that are largely intact and free from dark spots, okay? they’ll give you the smoothest walnut milk.
For the best experience, look for nuts that have a sweet aroma, fresh and not rancid—trust your nose here!
Signature Seasoning Blend
Now, let’s spice it up!. You can keep it simple or jazz it up with flavors. For a classic walnut milk, just add 1 teaspoon of vanilla extract and a pinch of salt.
But hey, if you wanna go big, why not try cocoa powder for a rich chocolatey vibe? or toss in a ripe banana for natural sweetness—you won’t regret it.
Smart Substitutions
What if you’re out of walnuts? No problem! Try pecans or almonds—both work wonders. For those of you avoiding nuts altogether, sunflower seeds are a surprising yet tasty substitution.
And if you’re following a specific diet, adjust your sweeteners! Maple syrup, honey or agave are all solid choices. Going low-sugar? Just skip the sweeteners altogether. Each tweak makes it your own!
Kitchen Equipment Essentials
Now let’s chat about some must-have tools. You’ll need a high-speed blender to get that nice creamy texture. a cheesecloth or nut milk bag is essential for straining out the pulp, making it smooth and ready to sip.
You can even use a simple fine mesh strainer if you’re in a pinch.
And after you’re done blending, don’t throw away that leftover walnut pulp!
get inventive—incorporate it in smoothies or in baking.
Yep! There’s zero waste here—only straight-up goodness from how to make walnut milk. The Bottom Line Voila! With simple ingredients and some basic kitchen equipment, make a serving of a tasty homemade beverage that’s also good for you.
Full-bodied, nutty flavor, making it a great choice for anyone, and especially if you are after vegan protein sources or just bored of your milk game.
Whether you throw it in smoothies or just drink it by itself, this simple walnut milk recipe is going to rock your world.
Stay close to learn because in the next post I’ll detail exactly how to do it from scratch.
and drag out that blender!
Unlocking the Secrets of Creamy Homemade Walnut Milk
Hey there, fellow food lovers! let’s chat about one of my new obsessions: homemade walnut milk. If you’ve never tried it, you’re in for a treat.
Not only is it a fantastic dairy-free milk alternative, but it’s also packed with flavor and nutrients. honestly, you won’t believe how easy it is to whip up this creamy delight at home.
Essential Prep Steps
Mise en place: before diving in, let’s get organized. you know what they say – “a messy kitchen equals a messy cook.
” So, gather your ingredients upfront: 1 cup of raw walnuts, 4 cups of filtered water, and any sweeteners or flavors you fancy.
Time management is 🔑: you’ll start by soaking those walnuts for at least 30 minutes. this helps soften them up.
Trust me, it makes a world of difference in texture when you’re blending. while they soak, you might want to prep the rest of your kitchen.
Safety first: When you’re blending, keep that lid on tight. There’s nothing worse than having walnut milk splattered all over your counter (and you).
Step-by-Step Process
- Soak the Walnuts: Toss those walnuts into a bowl of water and let them soak for at least 30 minutes. This isn’t just a request; it’s crucial for the best result!
- Drain and Rinse: After soaking, drain and rinse the walnuts until they’re nice and clean.
- Blend the walnuts: here’s where the magic happens! In your trusty blender, combine the soaked walnuts with 4 cups of filtered water. Blend that baby on high for about 1-2 minutes. You want it nice, smooth, and creamy.
- Strain the Mixture: Using a cheesecloth or a nut milk bag, pour the mixture through into a bowl. Squeeze out all that gorgeous liquid. No one wants chunky walnut milk!
- Sweeten and Flavor (Optional): If you’re feeling fancy, add 1-2 tablespoons of your preferred sweetener and a teaspoon of vanilla extract. Blend just a tad to mix it all in.
- Store that walnut milk: pour your silky walnut milk into an airtight container and store it in the fridge. it’s best enjoyed fresh but can hang tight for up to about 4 days .
Expert Techniques
When making creamy nut milk, there are some pro tips you shouldn’t overlook:
- Critical Steps: Always soak the walnuts. You’ll get a smoother finish. If you’re looking for something richer, soak them overnight!
- Quality Checkpoints: If your nut milk isn’t creamy enough, it might be that you didn’t blend long enough or didn’t strain thoroughly. So, take your time!
- Troubleshooting: If your walnut milk is too thick, just add a splash of water. Simple fix!
Success Strategies
Let’s get real – we’ve all messed up at some point. Here’s how to avoid some common mistakes:
- Over-soaking: Don’t go overboard with soaking. 30 minutes is usually perfect, but longer might give you a different flavor profile.
- Sweetness Levels: Taste before adding more sweetener. Start low – you can always add more, but you can’t take it out.
Now that you’ve mastered this homemade walnut milk, you can easily pivot this into so many recipes! Think walnut milk smoothies or drizzle it over your morning oatmeal.
So there you have it, folks! a super simple walnut milk recipe that’s not only delicious but also versatile. look into the world of nut milk, dairy alternatives, and feel the joy of nourishing your body with plant-based goodness.
Your kitchen is calling you to experiment, so don’t be shy!
Stay tuned for more tasty tips and tricks in the next section: Additional Information! I promise you won’t want to miss it!
Unlocking the Secrets of Homemade Walnut Milk
Alright, my friend, if you’re looking to elevate your pantry game, let’s chat about this easy walnut milk recipe! seriously, making your own nut milk is not only super simple, but it’s also a way to ditch those questionable store-bought options.
Plus, with walnut milk, you’re getting flavors that are downright rich and a bit nutty—perfect for those mornings when you just need a little pick-me-up.
So, without further ado, let’s dive into the nitty-gritty!
Pro Tips & Secrets
Alright, let’s talk shop! first off, soaking walnuts is a game-changer. give them at least 30 minutes, but if you want that extra creaminess, go for an overnight soak! when you blend those nuts, you’re really unlocking their magic—aim for a smooth, creamy consistency.
Oh, and don’t rush that straining process! Squeeze every bit of goodness from that walnut milk. it’s where all the magic lies!
For flavor enhancement, consider adding vanilla extract or a pinch of salt; this really brings out the nuttiness. If you want to sweeten the deal, maple syrup or honey can do the trick.
Remember to taste-test along the way. you know, a little drizzle here, a little dash there—it’s all about finding your sweet spot.
Perfect Presentation
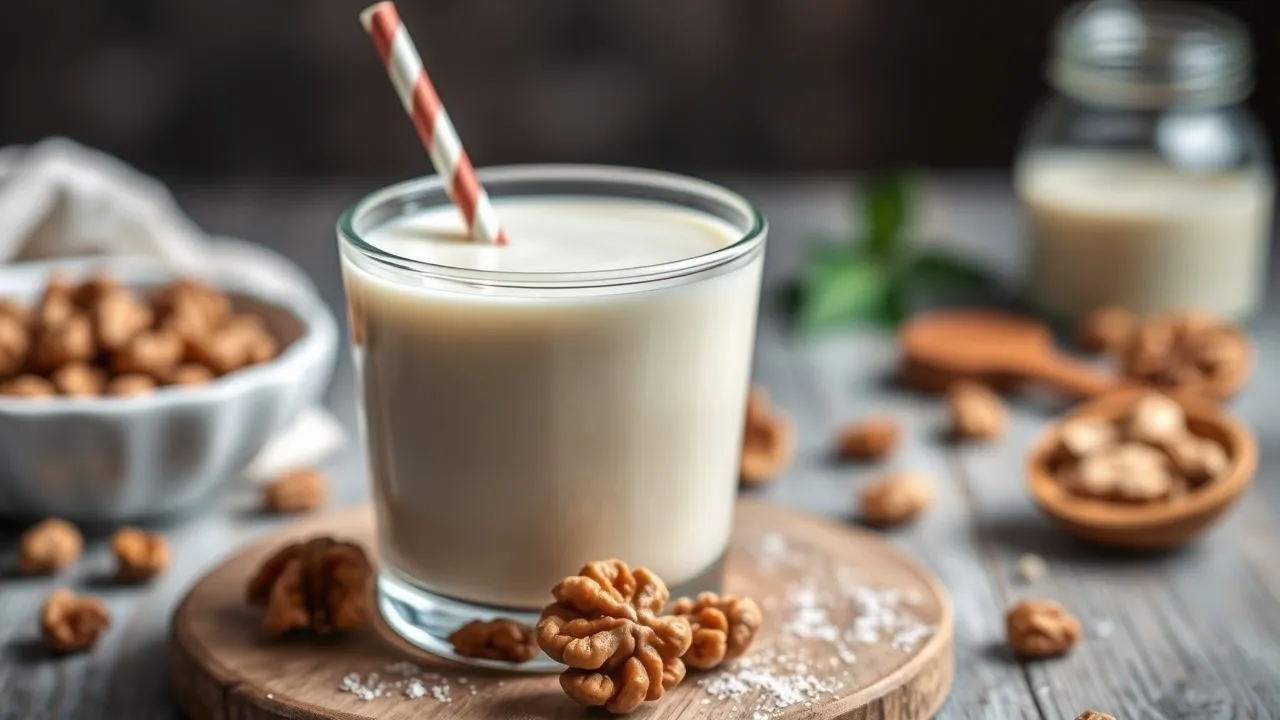
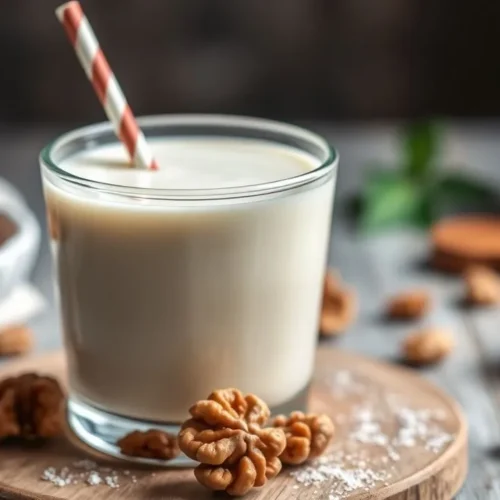
Alright, we all know presentation matters, especially when you wanna show off your creamy walnut milk. pour it into a nice glass or a mason jar—hey, we’re not savages here! if you’re feeling fancy, sprinkle a dash of cinnamon on top or toss in a few walnut pieces for texture.
Color combinations matter too! think deep, rich walnut hues against a bright splash of fruit in your smoothie. it’s all about the eye candy! clear glasses can let that beautiful nutty color shine.
So, let’s keep our eyes as happy as our taste buds!
Storage & Make-Ahead
What’s the scoop on storing homemade nut milk? easy peasy! just pop your walnut milk into an airtight container and stash it in the fridge.
It’ll stay fresh for about 4-5 days. got leftover walnut pulp? don’t toss that goodness! you can mix it into smoothies or throw it in baking recipes—hello, added nutrition!
When you’re ready to enjoy, just give it a good shake. Sometimes, the walnut pulp settles at the bottom, and nobody wants a funky texture. You’ll want that smoothness!
Creative Variations
Let’s spice things up because why not? want a chocolate twist? add some cocoa powder for a chocolate walnut milk experience.
Or if you’re in the mood for fruity flavors, toss in a banana when blending—it’s a game-changer!
And, hey, if you’ve got dietary restrictions, don’t fret! you can easily swap walnuts with pecans or almonds. if nuts aren’t your vibe at all, sunflower seeds work too! the world is your nut milk oyster, my friend.
Complete Nutrition Guide
Now, let’s talk nutrition. this healthy walnut milk packs a punch! it’s not just about being a tasty dairy-free milk alternative.
Walnuts are a fabulous source of omega-3 fatty acids, and even a small glass of this smooth walnut milk gives you a nice hit of vitamins.
Start with about 90 calories per serving and a couple of grams of protein. It’s not a meal replacement, but it definitely adds a nutritious touch to smoothies, coffee, or cereal.
Expert FAQ Solutions
Got questions about walnut milk? You’re not alone! A common conundrum is whether to use raw or roasted walnuts—go raw for that creamier texture! If your walnut milk ends up gritty, blend longer or strain more diligently—trust me, it’s worth it!
If you’re worried about sweetness, start light and build up. You got this!
Conclusion: Get Nutty with Walnut Milk
So there you have it, folks! With this easy walnut milk recipe, you can wave goodbye to store-bought nut milks.
Whether you’re sipping on it chilled, blending it into smoothies, or splashing it into coffee, the benefits of homemade nut milk are endless.
Don’t stress about perfection. just have fun with it! experiment, enjoy, and share your creations with folks who appreciate good eats.
Happy blending!
Creamy Homemade Walnut Milk
Ingredients
- 1 cup raw walnuts soaked for at least 30 minutes
- 4 cups filtered water
- 1-2 tablespoons sweetener of choice pure maple syrup, honey, or agave syrup
- 1 teaspoon vanilla extract optional
- Pinch of salt optional
Instructions
- Soak walnuts in a bowl of water for at least 30 minutes to soften.
- After soaking, drain and rinse the walnuts under cold water.
- In a blender, combine soaked walnuts and 4 cups of filtered water. Blend on high until the mixture is smooth and creamy (about 1-2 minutes).
- Place cheesecloth or nut milk bag over a large bowl or pitcher. Pour the blended mixture into the strainer. Squeeze the cloth/bag to extract as much liquid as possible.
- Add the sweetener, vanilla extract, and salt to the strained milk. Blend briefly to combine.
- Transfer to an airtight container and refrigerate.